Artnextdoor's Blog

My place to be creative


Leave a comment

Creative Week 42

This weeks quilt idea Gated Squares

Gated Squares Quilt


This quilt measures approx 84″ by 106.5″

Gated Squares Block 16 inches square


The block is 16″ square set on point.

Follow these links for the fabric requirements:-Gated Squares Quilt fabric requirements in yards.JPG

The rotary cutting instructions:-Gated Squares Rotary Cutting Info

Gated Square setting triangle rotary cutting instructions

Gated square corner triangles rotary cutting instructions

The left and right borders 2 x 8.5″ by 91″ and the top and bottom borders 2 x 8.5″ by 84 3/8″

Binding will need an additional 30″ of fabric cut into 12  2.5″ strips across the wide of the fabric, joined together.

Quilt Show Reminder

28th – 30th

West Country Quilt Show

Shepton Mallet

http://www.westcountryquiltshow.co.uk

Until next week, thanks for visiting.


2 Comments

Creative Week 41

This past week has rushed by, so fast I don’t know whether I am coming or going.

I have been selling things on Ebay to try to make room.  If you’d like to buy any embroidery yarns, patchwork and quilting items, knitting yarns, and games follow this link. (You may have to copy and paste.)

http://www.ebay.co.uk/sch/dotoyou/m.html?item=181259453283&pt=UK_Crafts_Knitting_Crochet_EH&hash=item2a33e7c363&rt=nc&_trksid=p2047675.l2562

This past weekend we went back to Hatton Country World http://hattonworld.com/ for the Christmas Food Fayre.  What can I say other than we’ll be okay for drink over the festivities!

We also called in to Wyndleys Garden Centre on the way home.  They don’t have their own website (strange in this day and age) but here is a guide

http://www.thebestof.co.uk/local/solihull/business-guide/feature/wyndley-garden-centre

It has certainly improved since our last visit some years ago, having a much better selection of gifts, Christmas items and of course plants, we will be going back to pick our yearly Christmas decorations.  This is a family tradition, each member of the family gets to pick a new tree decoration every year, we now have a variety of different items on our trees!  When we decorate for Christmas we have at least 6 trees in the house, this year I have managed to get agreement that we will be lighting the tree right outside our front door. Yeah!  I bought the solar lights a couple of weeks ago.  My neighbour already has her house decorated and lit up, she and I have had discussions on when we should put ours up, sadly my big son is a Grinch only wanting to talk about and be involved in celebrations from Christmas Eve until Boxing day (26th) Bah humbug!  Our decorations will be going up on 30th Novemeber -son you have been warned!

This weeks quilt idea:- Overlap

This quilt can be made in two ways- flying geese or squares on-point.

Flying geese overlap

squares on-point overlap

The following information relates to the flying geese version.

The quilt layout:- Layout flying geese overlap which measures approx 72″ by 81″, of course by adding columns and/or rows the quilt can be made larger or remove them to make it smaller.  Changing the size of the block will also achieve this.  Fabric needs will change if any of the dimensions are altered.

The block diagram

Flying geese overlap block

The block rotary cutting info:- Rotary cutting info for flying geese overlap.

Fabric needs in yards:- Fabric requirements in yards for flying geese overlap.

Here is the information for the squares on-point version.

squares on-point overlap block

As can be seen the block is a simple 9 patch, it is the placement of the fabric colours and turning the block on-point that makes the pattern for this quilt.

This link gives an indication of the fabric colour placement to assist with the pattern creation:- Layout squares on-point overlap

The fabric needs:- Fabric requirements in yards for Squares on-point.

The rotary cutting info

Block for squares on-point

Corner triangle for squares on-point

setting triangle for squares on-point

I have included a version of the flying geese done in various shades of one colour.  Measures 48″ by 54″ I have changed the block size to 8″ by 4″

one colour flying geese version

The fabric requirements are here:- Fabric for one colour flying geese overlap

The block rotary cutting info is here:- Rotary cutting info for flying geese overlap 1 colour version

And finally a square on-point version in various shades of one colour

one colour squares on-point overlap

This quilt measures 51″ by 63 1/2″ approx.  The block measures 9″ as before but I have reduced the number of blocks from a layout of 6 across by 7 down to 4 across by 5 down.

The fabric needs are here:- Fabric for one colour squares on-point

the block, setting triangle and corner triangle are the same as the multi coloured version above.

If I were to make this Overlap quilt I think I would personally choose to make the flying geese version.  Please let me know which you would go with.

Quilt show reminders.

21st – 24th

Knitting and Stitching Show

Harrogate

http://www.twistedthread.com/pages/exhibitions/viewExhibition.aspx?id=45

Until next week, thanks for visiting. x


2 Comments

Creative Week 40

Oops! I forgot to press the publish button, call it a blonde moment or a senior moment I fit both (according to my children) I suppose.

This weeks quilt idea:- Oh So Simple.

Oh So Simple Quilt

This quilt measures approximately 60.5″ square.

I can’t believe just how simple this is, here’s the block

Oh So Simple Block

The rotary cutting info is here:- Oh So Simple Block Rotary Cutting info

The first border is 2 x 2.5″ by 52.5″ for the top and bottom and 2 x 2.5″ by 48.5″ for the left and right.

The second border is 2 x 4.5″ by 60.5″ for the top and bottom and 2 x 4.5″ by 52.5″  for the left and right.

The fabric needs in yards for the quilt above:- Oh So Simple Fabric requirements in yards

The quilt layout:- Oh So Simple Quilt Layout.JPG

I then set the blocks on-point

Oh So Simple On Point Quilt

Here is the link for the on-point quilt layout OhSo Simple On Point Quilt Layout which measures approx 84″ by 101″

Link for fabric needs in yards for the op-point quilt Oh So Simple On Point Fabric Requirements in yards

The first border 2 x 2.5″ by 85 3/8″ for the left and right and 2 x 2.5″ by 72 3/8″ for top and bottom

The second border 2 x 6.5″ by 89 3/8″ for the left and right and 2 x 6.5″ by 85 3/8″ for top and bottom

Here are some more layouts with just this one block.  The first one is again on-point whilst the remaining three are straight set.

Layout onpoint 2 straight layout straight layout 2 straight layout 3


Until next week, thanks for visiting. x


2 Comments

Creative Week 39

This week little son has been off school for half term, so we have been out and about or watching films wrapped up in the warm, when the weather has been horrible.

On Tuesday we had a trip into Solihull to buy some Christmas presents – yes I know it’s a bit early but it is the only time we have to buy his fathers present without his dad being around.

On Wednesday we had a trip to Baddesley Clinton, which we have not visited before even though it is only down the road from where we live.

Photo from http://www.annie-and-chris.com/2012/08/31/baddesley-clinton/

Baddelsey Clinton is a moated manor house and well worth a visit.

The Great Hall at Baddesley Clinton

Photo from http://www.nationaltrust.org.uk/baddesley-clinton/

We also visited Hatton Country World before coming back to Baddesley Clinton.  http://hattonworld.com/.  Little son has grown out of wanting to visit the farm so just enjoyed the shops, especially the old fashioned sweet shop.  He also got some more ideas for Christmas presents for his brother and sister!  We will be going back in a couple of weeks for their Christmas craft fair.

So to this weeks quilt idea;- One Block, Secondary Patterns I know not a very good name but that describes what it is.

The Block

one block secondary patterns block

The Quilt

one block secondary patterns 6

The above measures 54″ by 72″, obviously this can be made larger or smaller as required, with or without borders.  The block size is 18″ so only 12 blocks are needed for this layout.

Follow this link for the fabric requirements;-  one block secondary patterns fabric yardage for No 6

The rotary cutting info;- one block secondary patterns rotary cutting info for No 6

I played with this block (and could continue to play around with it)

one block secondary patterns 5

one block secondary patterns OP 4

The above quilt measures approximately 73″ square, this time the 18″ block is set on point.

The fabric requirements are here;-

one block secondary patterns Fabric requirements for OP 4.JPG

The rotary cutting info is here;-

one block secondary patterns Rotary cutting info for OP 4.JPG

one block secondary patterns Rotary cutting info for setting triangles OP 4.JPG

The borders are as follows

Border 1 Top and bottom cut 2 1.5″ wide by 53 7/16″.  Left and right cut 2 1.5″ wide by 51 7/16″

Border 2 Top and bottom cut 2 2.5″ wide by 57 7/16″.  Left and right cut 2 2.5″ wide by 53 7/16″

Border 3 Top and bottom cut 2 1.5″ wide by 59 7/16″.  Left and right cut 2 1.5″ wide by 57 7/16″

Border 4 Top and bottom cut 2 2.5″ wide by 63 7/16″.  Left and right cut 2 2.5″ wide by 59 7/16″

Border 5 Top and bottom cut 2 1.5″ wide by 65 7/16″.  Left and right cut 2 1.5″ wide by 63 7/16″

Border 6 Top and bottom cut 2 4.5″ wide by 73 7/16″.  Left and right cut 2 4.5″ wide by 65 7/16″

one block secondary patterns OP 3

one block secondary patterns 2

one block secondary patterns 1

one block secondary patterns OP 8

one block secondary patterns OP 9

one block secondary patterns OP 7

And now before I return to playing with this block a show reminder.

7th – 10th November

Crafts for Christmas

NEC Birmingham

http://www.ichf.co.uk/indoorcraftsalive/?show=birmingham

Until next week, thanks for visiting. x


2 Comments

Creative Week 38

This weeks Quilt idea – The quilt with no name.

4 blocks 1 Quilt

This quilt is made up of 4 blocks

Block 1

Block 1 rotary cutting info

Block 2

Rotary Cutting info – Block 2 rotary cutting info

Block 3

Rotary Cutting info – Block 3 rotary cutting info

Block 4

Rotary Cutting info – Block 4 rotary cutting info

Rotary Cutting info for the borders

Border 1 Left and right cut 2 x 1.5″ x 72.5″ and top and bottom  cut 2 x 1.5″ x 74.5″

Border 2 Left and right cut  2 x 2.5″ x 74.5″ and top and bottom  cut 2 x 2.5″ x 78.5″

Border 3 Left and right cut  2 x 4.5″ x 78.5″ and top and bottom  cut 2 x 4.5″ x 86.5″

The quilt layout is here – Quilt Layout


Quilt show reminder

October/November

31st October – 3rd November

Knitting and Stitching Show

Dublin

http://www.twistedthread.com/pages/exhibitions/viewExhibition.aspx?id=45

November

1st – 3rd

Autumn Quilt Festival

Duxford

Thanks for visiting, until next week. x

http://www.grosvenorshows.co.uk/html/Autumn_Duxford.html


Leave a comment

Creative Week 37

All I have to say this week is:- The weather is awful, wet, soggy, grey, miserable and depressing.

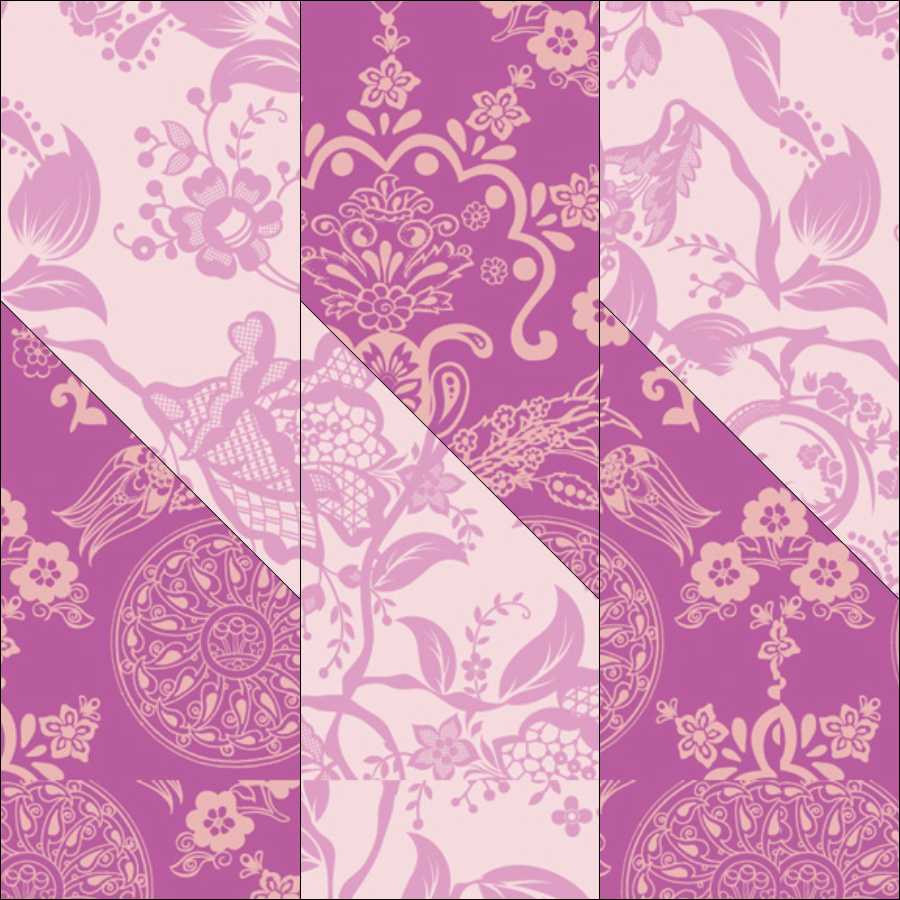
This weeks quilt idea:- Bring into focus  This quilt again uses Art Gallery Fabrics from the Pure Elements range and two studio designer ranges Poetica and Floressence.

Bring into focus

This quilt measures approximately 65.5″ by 82.5″

The quilt is made from two blocks a variation on each other.

bring into focus block 1

bring into focus block 2

Follow these link for Fabric Requirements:- Bring into focus Fabric Requirements in yards I have used Floressence FS-20021 Trellis Tulip for fabric 1; Poetica POE 801 Serenade Daylight for fabric 2, POE 808 Rhythmic Sky for fabric 3 and POE 803 Heartbeats Cool for fabric 5; and finally Pure Elements PE 433 Snow for fabric 4.

These links for the rotary cutting info for block 1:- bring into focus block 1 Rotary Cutting info, for block 2:- bring into focus block 2 Rotary Cutting Info and for block 2a:- bring into focus block 2a Rotary Cutting Info.

The borders are cut as follows:-

Border 1, sides, cut 2 1.5″ by 68 3/8″ and for the top and bottom 1.5″ by 53 7/16″

Border 2, sides cut 2 2.5″ by 70 3/8″ and for the top and bottom 2.5″ by 57 7/16″

Border 3, sides cut 2 4.5″ by 74 3/8″ and for the top and bottom 4.5″ by 65 7/16″

Quilt Show Reminders

24th – 27th

Crafts for Christmas

Glasgow

http://www.ichf.co.uk/indoorcraftsalive/

25th – 27th

Autumn Quilt Festival

Malvern

http://www.grosvenorshows.co.uk/html/Autumn_Malvern.html

My Starry Nights package finally arrived from the Missouri Star Quilt Co. last week so I hope to be working on those this week along with finishing off other bits and pieces which will brighten my day, offering relief from this dreary weather, bring on the sunny, frosty clear days.

So until next week, thanks for visiting. x


7 Comments

Creative Week 36

All is fairly quite in the house this week as little son is away in Germany on the return part of the student exchange.  He has been to school with his partner and is staying in his house too.  He has been taken bowling and to see the sights in Frankfurt but what else he has been up to is anyones guess, as I haven’t heard from in since Friday lunchtime, I hope he is having a great time and soaking up all things German.

I have finished the corset I was making for Halloween for my cousins daughter.  It was posted last Monday so should have arrived in Utah by now,  I am expecting photos of it being worn sometime soon. (hint hint)  But to be going on with here is a photo taken on my design wall.

Halloween Corset

This photo does not do it justice.  I really enjoyed making it apart from inserting the eyelets, there are 28 of them.

This weeks quilt idea.  Urban Mod Lattice

Urban Mod lattice

So called because I have again used Art Gallery Fabrics this time from the range called Urban Mod

This quilt measures approximately 72″ square, the blocks are set on point, in a 4 by 4 grid.  There are 3 different blocks, one being a plain square.

Urban Mod Lattice block 2

Urban Mod Lattice block 1

Follow these links for fabric yardage:- Urban Mod Lattice Fabric requirements and rotary cutting info:- Urban Mod Lattice block 1 Rotary Cutting info.JPG

Urban Mod Lattice block 2 Rotary Cutting info.JPG

Urban Mod Lattice block 3 Rotary Cutting info.JPG

Urban Mod Lattice 2nd Half block for top bottom and sides Rotary Cutting info.JPG

Urban Mod Lattice Top Bottom and side half blocks Rotary Cutting info.JPG

Urban Mod Lattice corner block Rotary Cutting info.JPG

and the borders:- Urban Mod Lattice side Border Rotary Cutting info.JPG  Urban Mod Lattice Top and Bottom Border Rotary Cutting info.JPG

Another variation Autumn Lattice  again using Art Gallery Fabrics this time from the Elements ranges of Oval Elements and Pure Elements

Autumn Lattice

Thanks for visiting, until next week. x

Creative Week 35

2 Comments

One of the biggest UK textile events of the year happens this coming week –

The Knitting and Stitching Show

10th – 13th

Knitting and Stitching Show

Alexandra Palace, London

http://www.twistedthread.com/pages/exhibitions/viewExhibition.aspx?id=45

This week has been a week of harvesting the last few tomatoes and making chutney.

Big son has finally planted the daffodils we bought together last week, not many only about 200 in our small front garden.  I won’t show any photos now as there is nothing to see but wait until next spring.  He has also revamped this garden, moved plants and changed the lawn from an odd shaped rectangle to a circle, which to me seems to be getting smaller by the day – He assures me it isn’t.

Today’s roast dinner is in the oven along with a loaf of bread for sandwiches for everyone to take to work tomorrow.

Roast Pork and Bread

This weeks quilt idea has been designed using Art Gallery Fabrics from their Elements range.

I have used PE – 440 Macchiatto, PE – 422 Chocolate, PE – 421 Honey and PE – 436 Creme de la Creme from their Pure Elements

GG – 8520 Dark Glitter from Living Elements and

LE – 209 Ebony from Lace Elements

I hope you like.  All the usual info will follow the photos.

Coffee and Cream Medallion Quilt.

Coffee and Cream Medalion Quilt 72 inches square

This quilt is made up of 4 blocks.

Coffee and Cream central block

Central medallion block

Link for rotary cutting info – Coffee and Cream central block Cutting info.JPG

Coffee and Cream block for borders 1 and 4

Block for borders 1 and 4

Link for rotary cutting info – Coffee and Cream block for borders 1 and 4 Cutting info.JPG

Coffee and Cream block for border 2

Border 2 block

Link for rotary cutting info – Coffee and Cream block for border 2 Cutting info.JPG

Coffee and Cream block for border 3

Border 3 block

Link for rotary cutting info – Coffee and Cream block for border 3 Cutting info.JPG

The following links are for the fabric requirements in yards – Coffee and Cream Fabric Requirements Yards.JPG

Until next week , thanks for visiting. X

This gallery contains 3 photos


2 Comments

Creative Week 34

There is a definite chill to the air now here in the UK.  Although the sun has been out all day today we have had a steady breeze, it has ensured the temperature has been held down.  I did manage to take a few photos of the very last of the flowers before the rain starts again.

dahlia 1 dahlia 2

The dahlias are still in flower but come the first frost they will be gone.

My last 3 roses

My last three roses for this year.

my last strawberry

My last strawberry!

drooping sunflower

The head of this sunflower is so heavy it has made the whole thing droop.

the one still to come

We do still have this one to come.

fucshia

Still in full flower, as are

The last of the nasturstions

and so are the sedums

sedum

You know when you wake up sometimes there is a remembered thought whether it be from a dream or something else, well last night was very restless and when I woke all I kept seeing/remembering was this little devil…..

One of the little devils that started it all

Obviously it wanted me to do something, but other than plant it out I could only think to try to recreate it in a quilt somehow.  Here are my drawings……

Basic sketch

         The basic sketch, which then moved on to ……

Block drawing

which then became this ……

drawing

which got put into this quilt diagram…

That pansy that kept me awake pieced quilt

Then I moved on to looking in the EQ7 block section for their rendition of a pansy, I found 2, one pieced and one a motif.

EQ7 pieced pansy

EQ7 applique pansy

from these I came up with these……..

That pansy that kept me awake EQ7 block quilt

and this …….

That pansy that kept me awake applique quilt

I drew the bee, my little son chose the colours.

The bee…

the bee

This last one is this weeks quilt idea – The Pansy that kept me awake.

It measures 27″ square approximately and is ideal for a table topper.  It needs fabric in the following amounts

  • Background – blue a 24.5″ square
  • yellow 3/8ths of a yard
  • pale mauve 1/8th yard
  • dark mauve 1/2 yard
  • black 1/8th yard
  • very pale beige 1/8th yard

The inner border cut from yellow need 2 pieces for the top and bottom 25.5 ” by 1″ and for the left and right 24.5″ by 1″.  The outer border, in dark mauve for top and bottom 27.5″ by 1.5″ and the left and right 25.5″ by 1.5″

A piece of batting and a backing fabric, both 29″ square.  Binding approx 130″ by 2.5″ wide.

Here are the links for the templates,

the large pansy:- Pansy that kept me awake templates flower

the small pansy:- Pansy that kept me awake templates flower small

the bee:- Pansy that kept me awake templates bee

the placement diagram:- quilt layout for the pansy that kept me awake table topper

Talking of table toppers, little son is off to Germany soon to stay with a family who’s son stayed with us in May.  So, I thought I would send a present for his mother over with my son.

Table topper

The pattern (yes I know I don’t usually follow commercial patterns but…) is from Patrick Lose’s website as part of his Party with Patrick scheme.

The close up….

table topper detail

This turned out to be a very, very quick project and I have not only finished this one but made (and finished) another ready for the Myton Hospice Christmas Fair.

This week I have also gone through my knitting yarns, gathering all the leftovers from projects and have found enough of one to make a cardigan, again as a gift so I don’t have to spend anymore money buying yarn at the moment.  I did find some that will be sold very soon as I don’t need/like/want it anymore, that will happen soon when I can get DD to upload it to Ebay for me.

That’s all for this week, thanks for visiting. X


5 Comments

Creative Week 33

This weeks quilt idea Hidden Depths. This design is based on the fret work on the windows of many of the hotels in Singapore, as many of the buildings there seem to have a space around them between the exterior and the interior, presumably this is done to help with the heat.  Very Art Deco ish.

Hidden Depths Quilt

This quilt measures approximately 60″ by 60″, of course, it could be made large with the addition of more blocks or adding borders.  The fabric requirements would be need to be added to.  This block would also make a great cushion cover by increasing the size of the block, adding borders and/or flanges.  The black bars give the appearance of receding whilst the orange come forward, but it could just be my eyesight – I am writing this without my glasses on!

Follow the links for the rotary cutting info – Hidden Depths rotary cutting info per block.  The block diagram – Hidden Depths Block. The fabric requirements in yards – Hidden depths fabric requirements (yards)

This version highlights the use of  Art Gallery Fabrics range Oval Elements and gives an impression of being woven.

Scrappy Hidden depths

Again it is approximately 60″ square.  The fabric measurements needed can be found here – Scrappy Hidden Depths Fabric requirements (yards)


This time I have added an applique version

Applique Scrappy Hidden Depths

This could be done in any number of ways, for example using the patterned fabric as the background with fuseable bias tape for the bars, or by cutting and fusing, then stitching the patterned fabric to the white background fabric.  There are of course other ways of doing applique work.   I have had in mind fusing the patterned fabric to the background then stitching around each piece, this again throws up a number of ways to carry out the task, using a fuseable web to the entire back of each piece or add just a strip of web to the the centre, then making sure the edges are thoroughly stitched in place to prevent fraying; or just stitching around each shape slightly in from the edge to encourage fraying.  Then of course there is the choice of which stitch to use – oh the possibilities.


Quilt Show Reminder

26th – 29th

Creative Stitches/Hobbycraft

Exeter

http://www.ichf.co.uk/csh/?show=exeter


Enjoy. Until next week, thank you for visiting. x